Scripts & User config
MultiversX provides scripts designed to streamline the process of installing a MultiversX node. This validator script is a general script for accessing the Mainnet, Devnet and Testnet networks.
To get started, you will begin by getting a copy of the latest version of the scripts from Github and configure it to match your local setup.
Nodes scripts should not be run as a root user. Such usage is not supported and may result in unexpected behavior.
Download the MultiversX Scripts
cd ~
git clone https://github.com/multiversx/mx-chain-scripts
Configure the scripts correctly
The scripts require a few configurations to be set in order to work correctly.
First and foremost, you need your exact username on your local machine. You can find out your current username by running the whoami command, which will print it out:
whoami
Next, in the variables.cfg file, edit and add your username in the following variables:
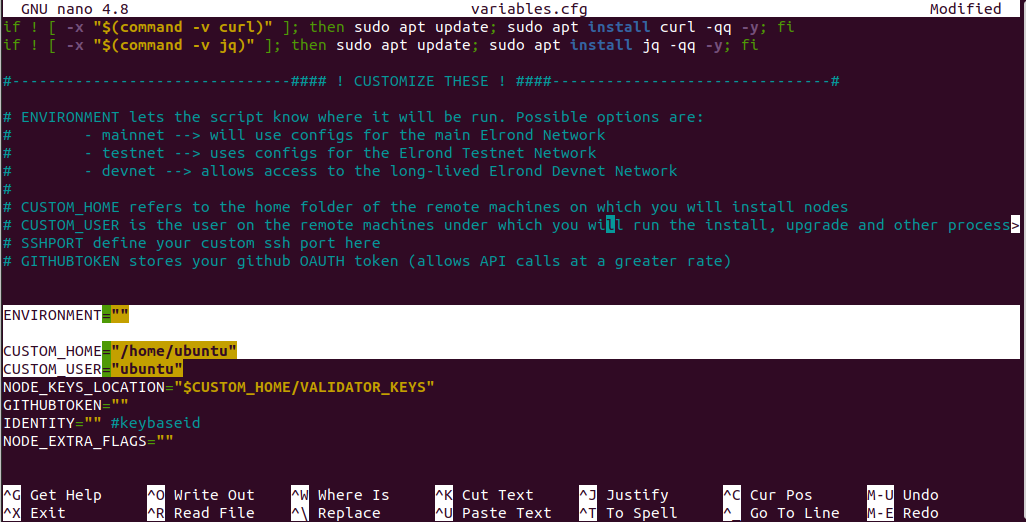
ENVIRONMENT: The MultiversX network to be used: mainnet, testnet or devnet.CUSTOM_HOME: This refers to the folder on the computer in which you will install your node.CUSTOM_USER: which is the username on the computer under which you will run the installation, upgrade, and other processes
Open variables.cfg in the nano editor:
cd ~/mx-chain-scripts/config
nano variables.cfg
Change the variables ENVIRONMENT, CUSTOM_HOME and CUSTOM_USER as highlighted in the image below:

For CUSTOM_USER variable, use the output of the whoami command that was run earlier.
Save the file and exit:
- If you’re editing with nano, press
Ctrl+X, theny, andEnter - If you’re editing with vi or vim, hold down
Shiftand pressztwice.
Ensure user privileges
Ensure your user has sudo enabled and accessible so that it doesn't ask for a password every time it executes something.
If you are certain this is already done, feel free to skip forward. Otherwise, you will need to add your username to a special list.
So let's add it to the overrides:
sudo visudo -f /etc/sudoers.d/myOverrides
Now, navigate to the end of the file by pressing Shift + G. Next, press o to add a new line, and type the following, replacing username with the output of the whoami command that was run earlier.
yourusername ALL=(ALL) NOPASSWD:ALL
Conclude by pressing Esc, then save and close the file by holding down Shift while pressing z twice.
Your user should now be able to execute sudo commands.